Vendors Guide on RFX Response
This is a step to step guide on how to submit your response when you are being invited by your customer for an RFX event.
Submitting RFX Response
This section will cover the process from receiving invitations from your customer via email until submitting your response.
If you have any questions during the submission, please contact your customer for assistance.
Step 1 : Receiving Link and Code In Your Email Inbox
Go to your email inbox in which you will receive 2 emails :
1. One invitation email containing a “View Details” button to access the response page.
2. The other email contains an access code.
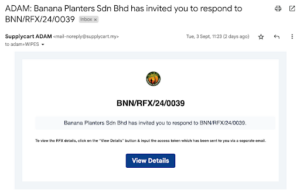
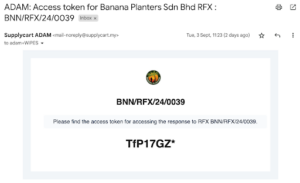
In case you did not receive the above emails, please follow these troubleshooting steps :
1. Check your Spam/Junk Folder:
Look for the email by searching for its title. If found, configure your email settings to mark all future emails from mail-noreply@supplycart.my as “Not Spam” or “Not Junk” to ensure smooth delivery going forward.
2. If the Email is Not in the Spam/Junk Folder:
Please contact your IT team and request to whitelist the sender mail-noreply@supplycart.my. After whitelisting, reach out to your customer and request that they resend the access link to you.
If you received the access link but not the code, please click “View Details” and then “Request New Code” to have the access code resent to you.
Step 2 : Accessing the RFX Response
a. Copy the code from the access code email.
b. Click “View Details” in the access link email and paste the code.
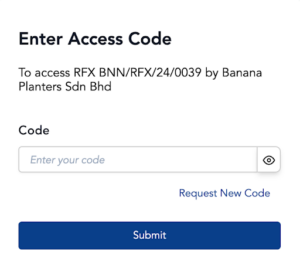
Note : In case you did not receive or lost the access code, click “Request New Code” and then “Yes” for NEW access code to be sent to you. Please be aware that by doing so, any previous access code will become invalid.
You may refer to Step 1 for instructions on retrieving the code.
Step 3 : Accept or Reject RFX Invitation
Upon successfully entering the valid access code, you will be directed to the RFX response page. You may go through the event then click “Accept” or “Reject” the invitation.
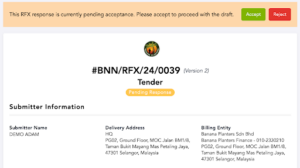
The invitation will turn “Expired” if you have not responded after the Acceptance Deadline or Event Ended set by your customer.
An email will be sent to your customer notifying them of your acceptance or rejection.
Step 4 : Respond to RFX Invitation
In case you accidentally exited the page, you can always resume by clicking the access link in the email mentioned in Step 1. If you have any questions or need further clarification regarding the registration, please contact your customer for assistance.
Based on the configuration set by your customer, the response page MAY contains following section :
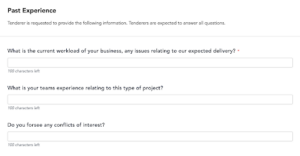
a. PreQ / ITR Questionnaire
Type to fill in the information accordingly.
Note: Any field with asterisk ‘ * ‘ indicates this is a required field
b. Vendor Information
Type into Vendor Remarks field to add remarks or attach any supporting documents.
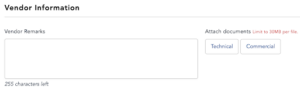
Attachment Type :
1. Technical : Referring to the technical supporting documents to be assessed by
your customer when performing Technical Evaluation
2. Commercial : Referring to the supporting documents to be assessed by your
customer when performing Commercial Evaluation
Note: You may upload more than one file with each file size limit capped at 30MB.
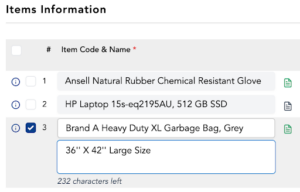
c. Items Information
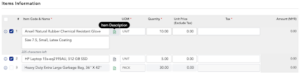
You may click on the “document” icon to view the item description. Select all or select
individual items you would like to quote by clicking “checkbox” on the left then fill up
the “Unit Price” and “Tax” applicable for each item.
Depending on the configuration by your customer, you MAY allowed to :
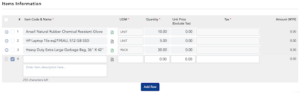
1. Propose New Items
Click “Add Row”, then fill up your proposed items information. To remove, click on
the “bin” icon on the left.
2. Edit Requested Items
Click “checkbox” on the left, edit the item name and description as required.
Step 5 : Clarification
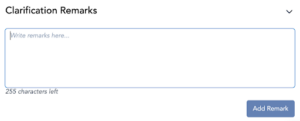
If your customer has allowed clarification in the response page, scroll to the bottom of the page and locate the “Clarification Remarks” field.
Input questions into the field and click “Add Remark” which your customer will receive a notification email.
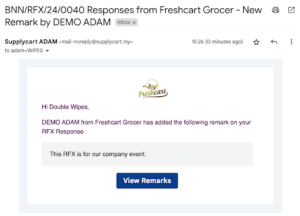
When your customer has responded to your questions, a notification email will be sent to you. Click “View Remarks” to redirect to your response page, where all conversations between you and your customer are captured.
Step 6 : Submitting Response
Once you have completed filling up, click “Save” to save changes you have made.
Review and confirm all information is correct before clicking “Next” and “Submit” to submit your response and your customer will be notified of your submission.

Note: If the “Next” button is greyed out, please recheck your page to ensure all compulsory fields are filled. Any field with asterisk ‘ * ‘ indicates a compulsory field.
To access your submission, click on the invitation email mentioned in Step 1.
If you wish to make changes to your submission, please contact your customer for assistance.
Status Definition
This section provides definitions for statuses displayed in the RFX response page.

* Pending Response : Pending for your acceptance or rejection of invitation
* Accepted : You have accepted the invitation pending submission
* Rejected : You have rejected the invitation
* Submitted : You have submitted your response
* Expired : No response received past acceptance deadline or event ended