Step 1: Search for the relevant submission as per the section above
Step 2: Click ‘Remind’
Submitting a Payment Request
This section will cover the process of submitting a Payment Request Form for approval
Step 1: Under ‘Payment Request’, click on ‘My Payment Requests’
Note: If you are unable to access the ‘Payment Request’ module, please contact your ADAM administrator
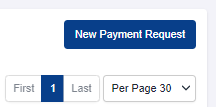
Step 2: Click ‘New Payment Request’
Note: If you already have an existing Payment Request that has yet to be submitted, a Draft will be saved. When there is an existing Draft, the button will show ‘Drafted Payment Request’ to allow you to access your current draft. To create a new submission, you will need to cancel or complete the existing draft
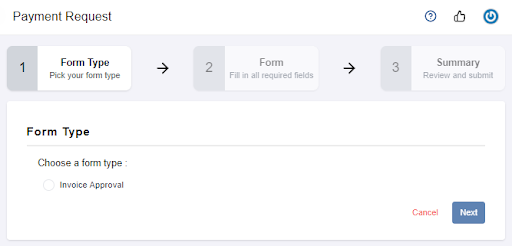
Step 3: Choose a ‘Form’
Select Form Type and click ‘Next’
Note: If you are unable to find a specific form, please contact your ADAM administrator to assign the form to you
Step 4: Fill in all required fields
There are two main sections in the form
Main Information
Vendor Invoices
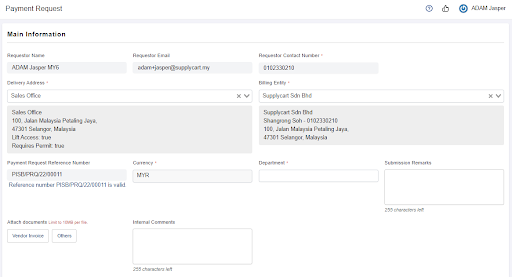
1. Main Information This section relates to the requestor’s details
The requestor name, email & contact number would be auto-filled. Delivery & Billing Address will be pre-filled, you may change to any other entities and addresses assigned to you
Internal comments inputted would be seen by your approvers and the procurement team
Note: Any field with asterisk ‘ * ‘ indicates this is a required field
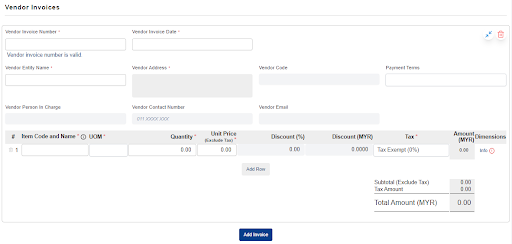
2. Vendor Invoices Information This section relates to the vendor invoices detail that you would like to submit. Click ‘Add Row’ to add more item(s)
Should you need to add additional invoices (whether from the same or different vendors), click on ‘Add Invoice’
Step 5: Click ‘Next’
If the ‘Next’ button is greyed out, please recheck your form to ensure all compulsory fields are filled
Note: Any field with asterisk ‘ * ‘ indicates a compulsory field. Any icons highlighted in Red indicate a compulsory field has not been filled up
Step 6 : Review and click ‘Submit’ to complete your form
Review and confirm all information is correct before submitting
Upon submission, you will receive an email confirming that your submission is successful and submitted for approval
Action on Submitted Payment Requests Forms
This section will run-through how you can act on your submitted payment requests form
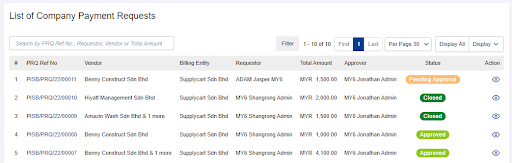
Step 1: Under ‘Payment Request’, click on ‘My Payment Requests’ or ‘Company Payment Requests’
My Payment Requests : Showing all Payment Requests submitted by you
Company Payment Requests : Showing all Payment Requests submitted under the billing entity and/or delivery address you are assigned to
Step 2: Search and filter payment requests submitted
You will be redirected to a page where it shows a list of payment requests that you or your organisation have submitted
Use the search bar to identify specific submissions. You may refer to the placeholder text within the search bar. You may also filter submissions by using the “Filter” button
Viewing Submitted Payment Requests Forms
This section will run-through how you can view your submitted payment requests form
Step 1: Search for the relevant submission as per the section above
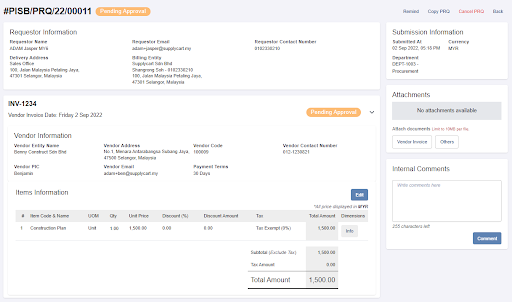
Step 2: Click ‘View’
You will be redirected to submitted payment request detail page
Payment Requests Form status definition :
New : No approval flow set up
Pending Approval / Review : Waiting for requests to be fully approved/ reviewed
Incomplete : Approval flow issue
Cancelled: Requestors cancelled requests before approval
Approved: Requests fully approved
WIP: Someone updated the RQ Status
Closed: All actions have been completed
Declined: Not to be actioned further
Rejected: Approvers rejected requests
Copy Payment Requests Forms
This section will run-through how to copy previously submitted payment requests
Step 1: Search for the relevant submission as per the section above
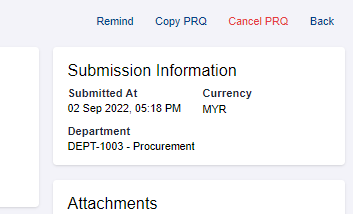
Step 2: Click ‘Copy PRQ’
Note: Please take note that Copy PRQ will replace your current drafted payment request form
Step 3: Fill in all required fields
By default all details will be copied and pre-filled in your drafted form. If there are compulsory fields that are not pre-filled, you will still be required to fill in the additional details
Cancel Payment Requests Form
This section will run-through how to cancel your submissions
Note: Cancellation can only be done for form under ‘Pending Approval’ or ‘Pending Review’ status
Step 1: Search for the relevant submission as per the section above
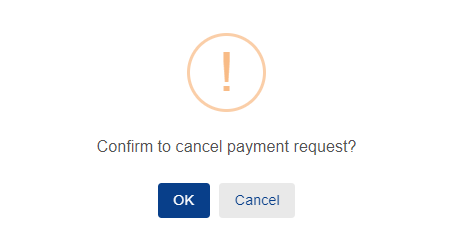
Step 2: Click ‘Cancel PRQ’
Click on the ‘OK’ to confirm your cancellation
If you wish to edit and resubmit your payment request, please refer to ‘Copy Requests Forms’ above
Note: If your request has been approved, please reach out to approver or company admin to ‘Decline’ your submission
Reminding Approver(s)
This section will run-through how to remind the approver(s) to approve or review your form
Step 1: Search for the relevant submission as per the section above
Step 2: Click ‘Remind’
This action will resend the approval email to the approver for their action
Note: Users are only allowed to remind the approvers once a day
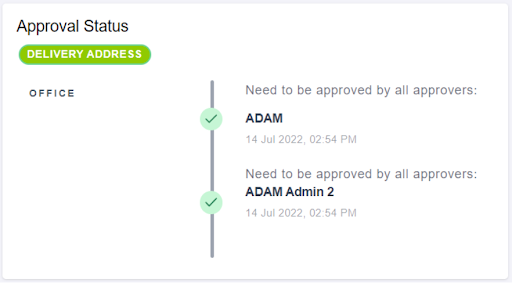
To view the approval flow for your submitted payment request, click ‘Approval Status’ in the payment request detail page