Approve or Reject via Email
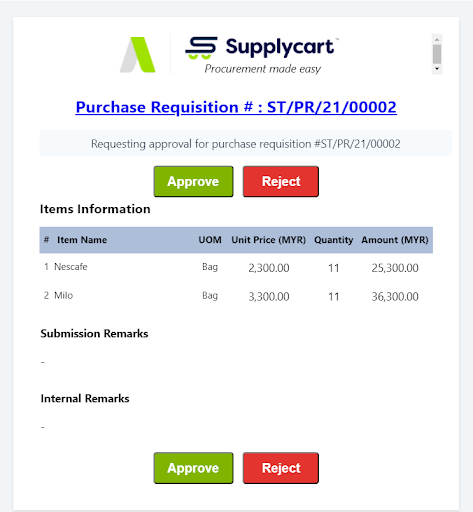
Step 1: Review the details on the email
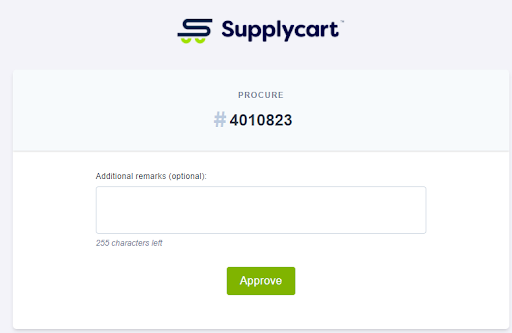
Step 2a: To approve a Submission, click ‘Approve’
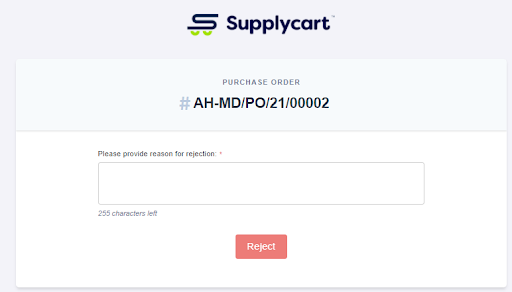
Step 2b: To reject this Request , click ‘Reject’
Approve or Reject via ADAM
Step 1: Select the type of Approval from ADAM
Step 2: Approve or Reject directly from the Approval List page
Step 3: Review from within the Submission Details page
Out of Office
Step 1: Select Out of Office at your Username
Step 2: Nominate your relief approvers at each form type
Step 3: Confirm your Relief Approvers
Step 4: Coming Back into Office
Approval Logs
Revisiting Previous Submissions via ‘Approval’ Page
Revisiting Previous Submissions via ‘Company Submission’ Page
Approve or Reject via Email
Step 1: Review the details on the email

Step 2a: To approve a Submission, click ‘Approve’
This will redirect you to a page to approve the submission. Click on ‘Approve’ to confirm approval of the Submission
Note: You may also input any comments at this page.

Step 2b: To reject this Request , click ‘Reject’
This will redirect you to a page to input the reason for rejecting the requisition. Once this has been done, you may click ‘Reject’ to complete the rejection.
