Submitting a Request For Quotation
Step 1: Under ‘Request For Quotation’, click on ‘My Request For Quotations’
Step 2: Click ‘Create’
Step 3: Choose a ‘Form’
Step 4: Fill in all required fields
Step 5: Click ‘Next’
Step 6 : Review and click ‘Submit’ to submit
Manually Ending a Request For Quotation Event
Step 1: Under ‘Request For Quotation’, click on ‘My Request For Quotations’
Step 2: Search and filter submissions under ‘Open’ status
Step 3: Click ‘View” icon
Step 4: Click ‘End Quotation’
Submitting a Request For Quotation
This section will cover the process of submitting a Request For Quotation Form to vendor
Step 1: Under ‘Request For Quotation’, click on ‘My Request For Quotations’

Note: If you are unable to access the ‘Request For Quotation’ module, please contact your ADAM administrator.
Step 2: Click ‘Create’
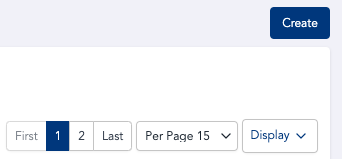
To continue editing your draft, search and filter your draft and click ‘View Details’ icon.

Step 3: Choose a ‘Form’
Select Form Type and click ‘Next’
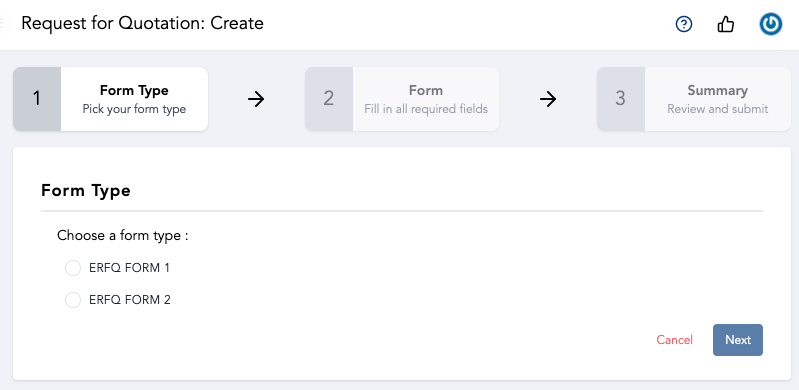
Note: If you are unable to find a specific form, please contact your ADAM administrator to assign the form to you.
Step 4: Fill in all required fields
There are four main sections in the form
- Delivery Information
- Event Details
- Items/Products Information
- Vendor Information
1. Delivery Information
This section relates to the requestor’s detail
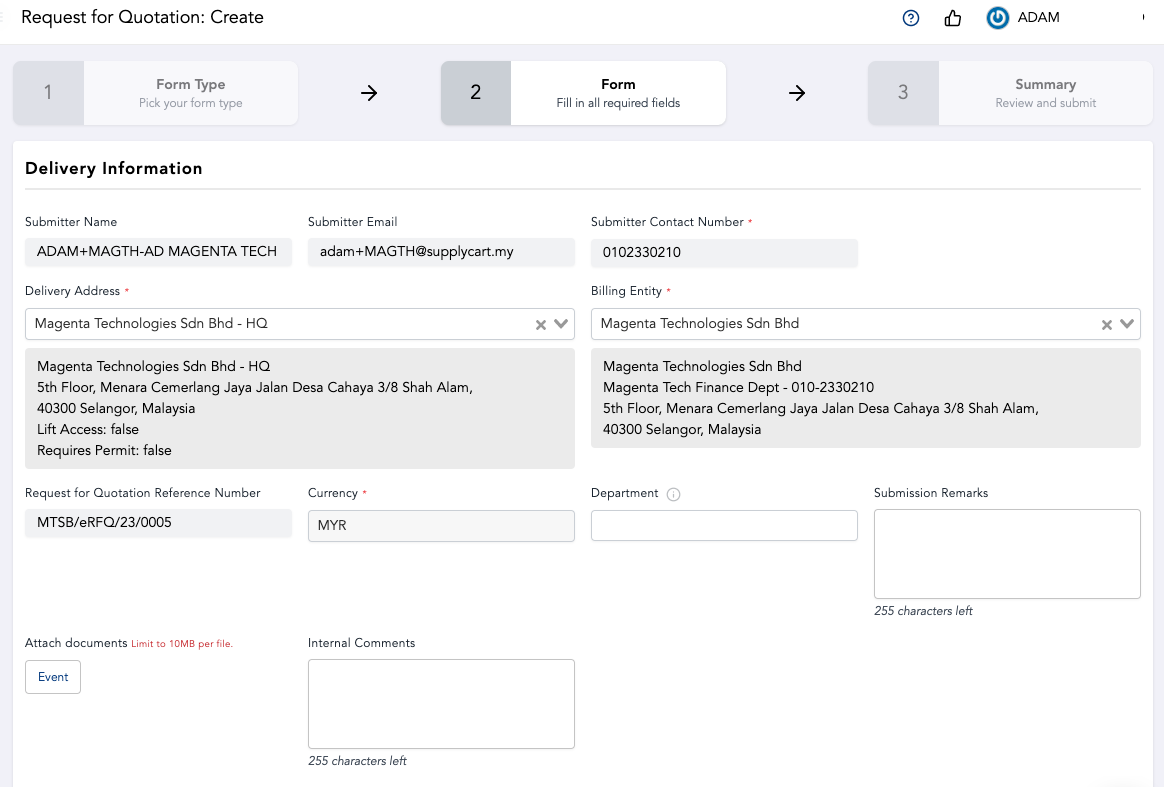
The submitter name, email & contact number would be auto-filled. Delivery & Billing Address will be pre-filled, you may change to any other entities and addresses assigned to you.
Internal comments inputted would be seen by your approvers and the procurement team. Input Submission Remarks or attach files under ‘Attach documents’ to remarks or sharing files with your vendor(s)
Note: Any field with asterisk ‘ * ‘ indicates this is a required field
2. Event Details
This section relates to the RFQ event’s detail and allows configuration of end date for quotation submission

Indicate your expected Delivery Date and the RFQ End Date and Time. The vendor(s) will not be able to submit their quotation past end date and time.
Note: You may end the RFQ earlier by manually clicking “End Quotation” button after submitted.
3. Items/ Products Information
This section relates to the item that you would like to submit. Depending on the form setup, you can either input the item(s) via :
a. Free Form Text, or
b. Add from a Mapped Request / Purchase Requisition Form
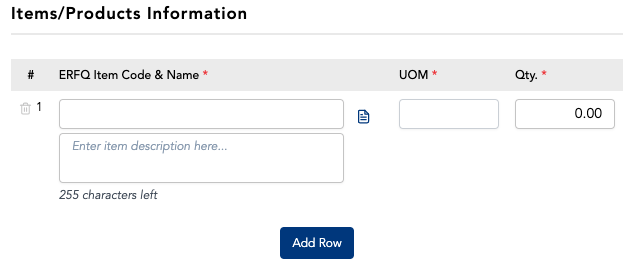
a. Free Form Text
Click ‘Add Row’ and type to fill in the information accordingly.
Click the ‘document’ icon to add item description
b. Add from a Mapped Request (RQ) / Purchase Requisition (PR) Form
If your company has enabled ‘Add Item from Approved Origin Form’ for the form, you may add items/products from approved RQ/PR forms.
Click ‘Add Items From Approved RQ/PR’, then select item(s) to add into the RFQ.
Note: Use the search bar to identify specific item. You may refer to the placeholder text within the search bar.
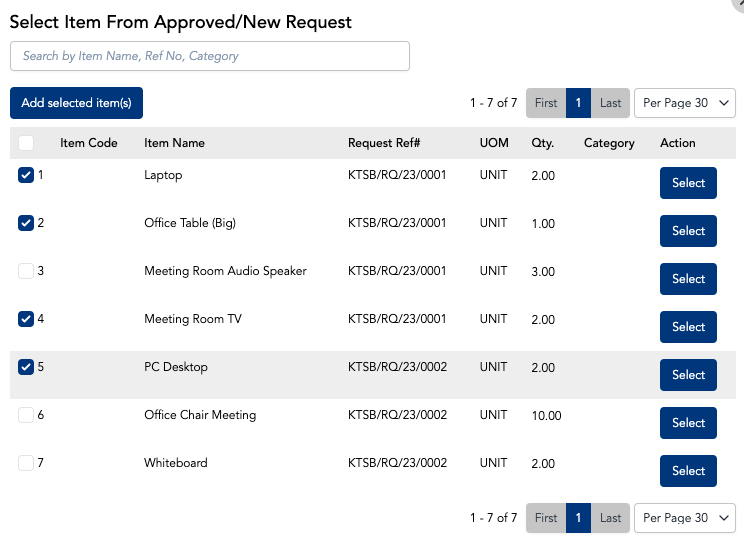
You may edit the item(s) and item description or adjust the quantity for these added item(s)

4. Vendor Information
At this section, search or input the name of the Vendor you are raising this RFQ to.
Note: Use the search bar to identify specific vendors. You may refer to the placeholder text within the search bar.
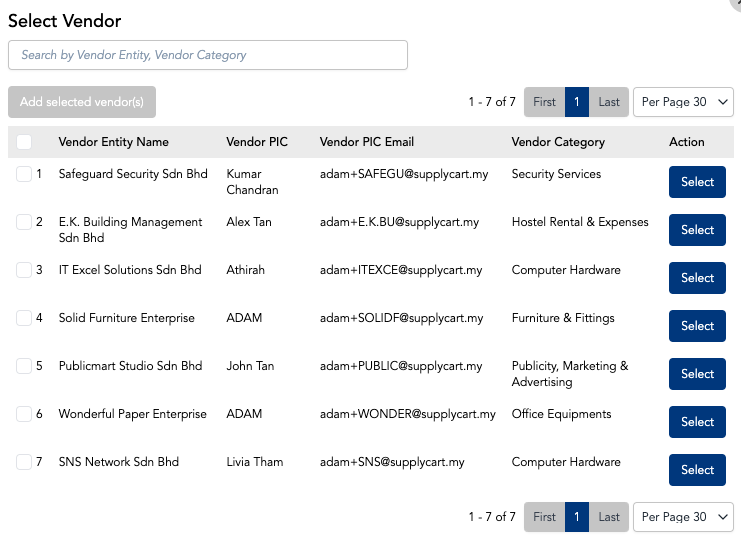
Click “Select From My Vendor” to select available vendors related to the Billing Entity you selected. Contact your ADAM Administrator if your required vendor is not visible.
If your company has enabled Unregistered Vendor for the form, you may add unregistered vendor

Note: Upon submission, the unregistered vendor will be automatically created under My Vendor. Complete the vendor creation by filling up vendor details under My Vendor before you may select for your future RFQ.
Step 5: Click ‘Save’/ ‘Next’

Click ‘Save” to save draft, click ‘Next’ to proceed with submission. If the ‘Next’ button is greyed out, please recheck your form to ensure all compulsory fields are filled.
Note: Any field with asterisk ‘ * ‘ indicates a compulsory field. Any icons highlighted in Red indicate a compulsory field has not been filled up.
Step 6 : Review and click ‘Submit’ to submit
Review and confirm all information is correct before submitting.
Upon submission, you will receive an email confirming that your submission is successful and submitted for RFQ.
Manually Ending a Request For Quotation Event
This section will cover the process of manually ending a Request For Quotation event before the end date
Step 1: Under ‘Request For Quotation’, click on ‘My Request For Quotations’

- My Request for Quotations : Showing all RFQ submitted by you
- Company Request for Quotations : Showing all RFQ submitted under billing entity and/or delivery address you are assigned to.
Note: If you are unable to access the ‘Request For Quotation’ module, please contact your ADAM administrator.
Step 2: Search and filter submissions under ‘Open’ status
You will be redirected to a page where it shows a list of RFQ event that you or your organisation have submitted
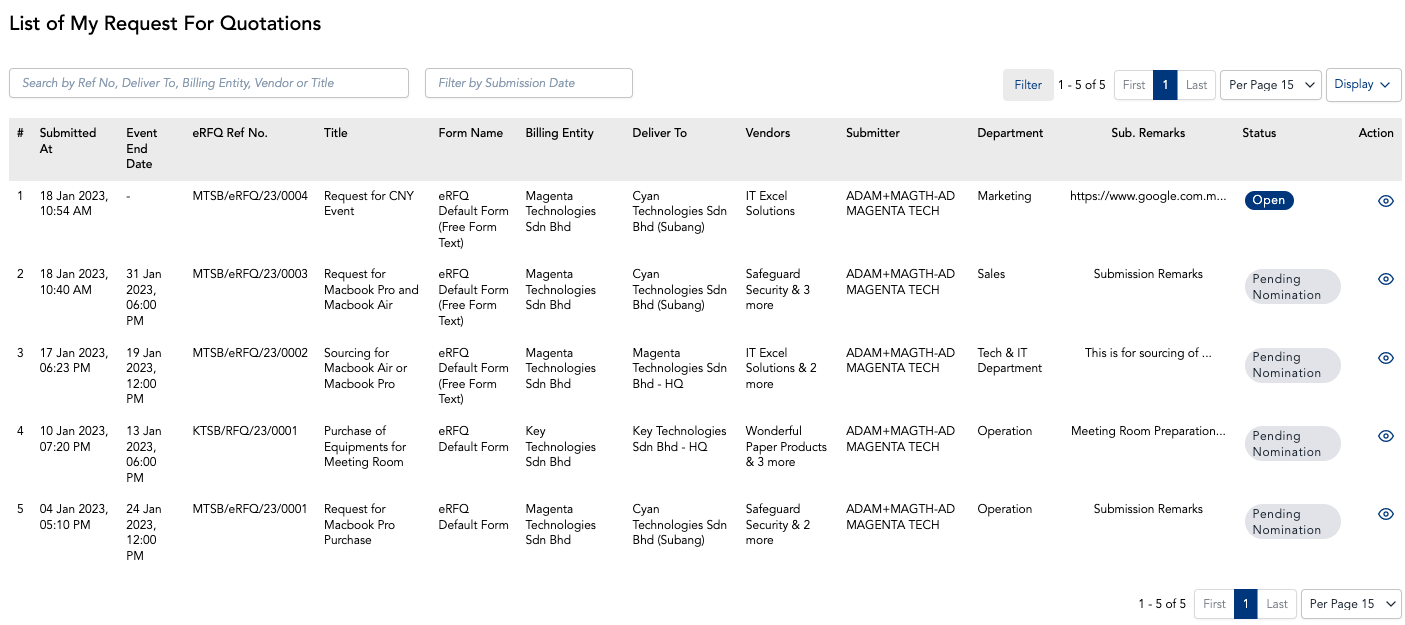
Form status definition :
- Draft : RFQ is in draft and yet to be submitted
- Open : Event is active, pending submission from vendor(s)
- Pending Nomination : Event ended, pending user to nominate
Note: Use the search bar to identify specific submissions. You may refer to the placeholder text within the search bar. You may also filter submissions by using the “Filter” button. You may configure the columns visible at this page via the “Display” button
Step 3: Click ‘View” icon
You will be redirected to submitted RFQ detail page
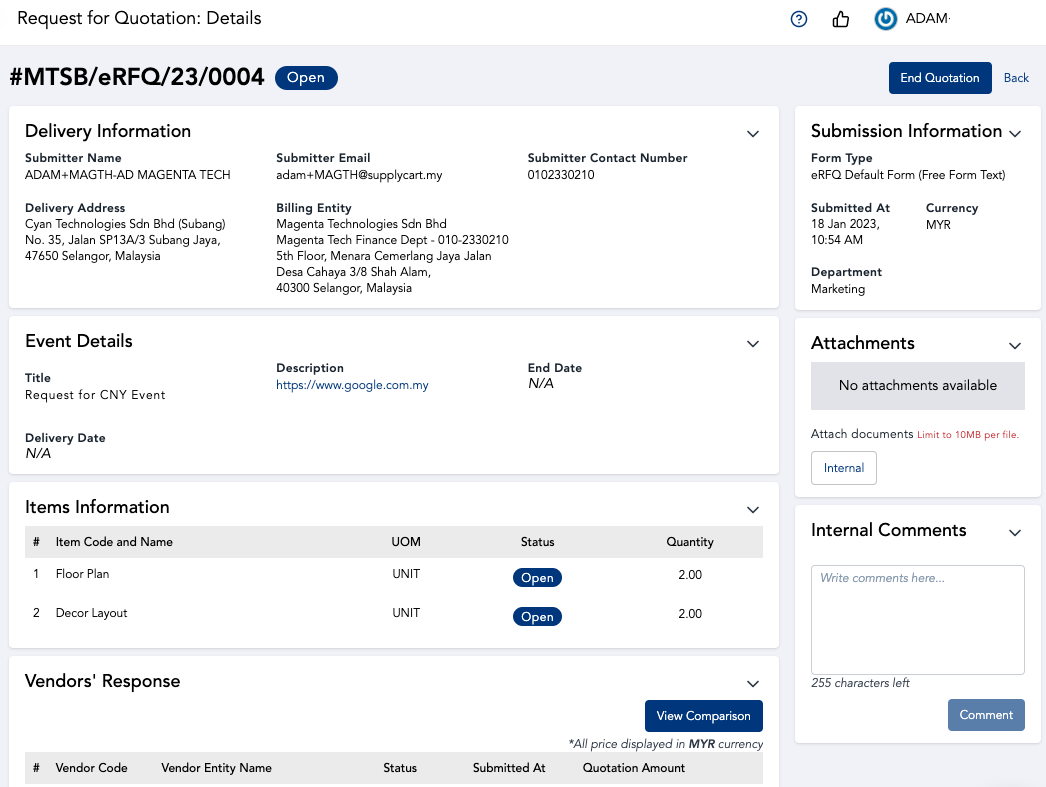
Step 4: Click ‘End Quotation’
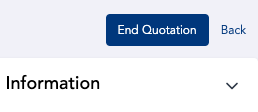
Note: Vendor(s) will be notified of the ending of RFQ event
Submitting a Request For Quotation
This section will cover the process of submitting a Request For Quotation Form to vendor
Step 1: Under ‘Request For Quotation’, click on ‘My Request For Quotations’

Note: If you are unable to access the ‘Request For Quotation’ module, please contact your ADAM administrator.
Step 2: Click ‘Create’

To continue editing your draft, search and filter your draft and click ‘View Details’ icon.

Step 3: Choose a ‘Form’
Select Form Type and click ‘Next’

Note: If you are unable to find a specific form, please contact your ADAM administrator to assign the form to you.
Step 4: Fill in all required fields
There are four main sections in the form
- Delivery Information
- Event Details
- Items/Products Information
- Vendor Information
1. Delivery Information
This section relates to the requestor’s detail

The submitter name, email & contact number would be auto-filled. Delivery & Billing Address will be pre-filled, you may change to any other entities and addresses assigned to you.
Internal comments inputted would be seen by your approvers and the procurement team. Input Submission Remarks or attach files under ‘Attach documents’ to remarks or sharing files with your vendor(s)
Note: Any field with asterisk ‘ * ‘ indicates this is a required field
2. Event Details
This section relates to the RFQ event’s detail and allows configuration of end date for quotation submission

Indicate your expected Delivery Date and the RFQ End Date and Time. The vendor(s) will not be able to submit their quotation past end date and time.
Note: You may end the RFQ earlier by manually clicking “End Quotation” button after submitted.
3. Items/ Products Information
This section relates to the item that you would like to submit. Depending on the form setup, you can either input the item(s) via :
a. Free Form Text, or
b. Add from a Mapped Request / Purchase Requisition Form
a. Free Form Text
Click ‘Add Row’ and type to fill in the information accordingly.
Click the ‘document’ icon to add item description

b. Add from a Mapped Request (RQ) / Purchase Requisition (PR) Form
If your company has enabled ‘Add Item from Approved Origin Form’ for the form, you may add items/products from approved RQ/PR forms.
Click ‘Add Items From Approved RQ/PR’, then select item(s) to add into the RFQ.
Note: Use the search bar to identify specific item. You may refer to the placeholder text within the search bar.

You may edit the item(s) and item description or adjust the quantity for these added item(s)

4. Vendor Information
At this section, search or input the name of the Vendor you are raising this RFQ to.
Note: Use the search bar to identify specific vendors. You may refer to the placeholder text within the search bar.

Click “Select From My Vendor” to select available vendors related to the Billing Entity you selected. Contact your ADAM Administrator if your required vendor is not visible.
If your company has enabled Unregistered Vendor for the form, you may add unregistered vendor

Note: Upon submission, the unregistered vendor will be automatically created under My Vendor. Complete the vendor creation by filling up vendor details under My Vendor before you may select for your future RFQ.
Step 5: Click ‘Save’/ ‘Next’

Click ‘Save” to save draft, click ‘Next’ to proceed with submission. If the ‘Next’ button is greyed out, please recheck your form to ensure all compulsory fields are filled.
Note: Any field with asterisk ‘ * ‘ indicates a compulsory field. Any icons highlighted in Red indicate a compulsory field has not been filled up.
Step 6 : Review and click ‘Submit’ to submit
Review and confirm all information is correct before submitting.
Upon submission, you will receive an email confirming that your submission is successful and submitted for RFQ.